Your first mod
Getting Started
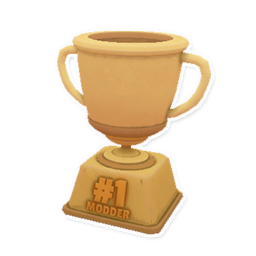
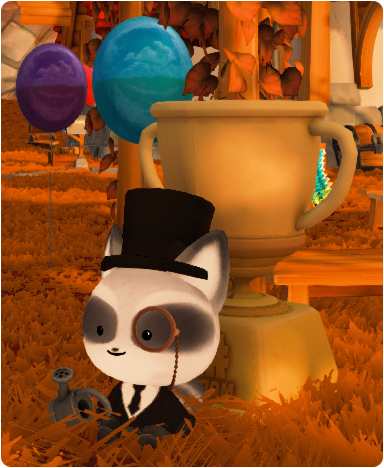
You want to start your journey as a modder in Garden Paws? Great! I have just the thing! You can have this #1 Modder Trophy... If you earn it by following this guide!
Don't be scared! Modding in Garden Paws can be as simple as writing a few text files! In this guide you'll learn how to write basic json files and how the folder structure for mods work in Garden Paws. By the end you will have created your first item and receive it in the game's Mailbox.
Creating the Mods Folder
First, we need to create our "Mods" folder if we don't have one yet. Find the persistent Garden Paws folder in your computer and create a folder called Mods
Creating the Mods Folder
To create our Mods folder we need to go to the persistent Garden Paws folder. You can find it easily by typing this in your Windows Explorer:
%AppData%\..\LocalLow\Bitten Toast Games\GardenPaws\
Once you're in that folder create an empty folder called "Mods".
AppData └──

Now that we have our Mods folder we can create a folder for our project. We want it to be unique to us so it doesn't conflict with other mods, so you can use a prefix like your name.
I'm going to call mine bToast_FirstMod. My folder will then be found in "Bitten Toast Games\Garden Paws\Mods\bToast_FirstMod\"
Folder Structure
Tip
Whenever you're adding an ID or file make sure to include a unique prefix. If other mods use the same ID or filename as yours your mod might not work.
Overview
In the real world we might think of an item as a single thing "The Trophy". But in games like Garden Paws a single item is like a recipe with many ingredients.
Our trophy has textures (images that define the colors of the object), a model (A 3d representation of the object.), an icon (a small image that represents our trophy in our inventory) and lastly an item file that holds all other information about it (Name, description, price, etc.).
Here's how our mod folder might look by the end:
Folder Structure
items │ └───
trophy.json │ ├────
bittenToast_trophyIcon.png │ ├────
bToast_ModderTrophy.obj
But don't worry! We'll go step by step adding the pieces of our recipe together and I'll explain things along the way.
So let's get started!
Adding the trophy files
Our Trophy has a .obj file which holds the 3d model data and 3 png files that hold its texture information (We could use only one for diffuse, but for extra effects we want to also use a Normal map.)
Adding our Trophy Model
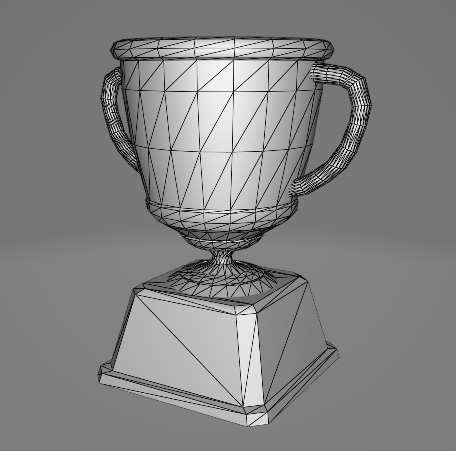
You can download bToast_ModderTrophy.obj by right clicking here and selecting "Save link as".
We're going to place it in a new "models" folder.
So create a new folder called "models" and place the .obj file inside.
Folder Structure
Tip
The Modding system keeps a list of all the available models in all mods "models" folders, and can use them for items or entities.
Adding our Trophy Textures
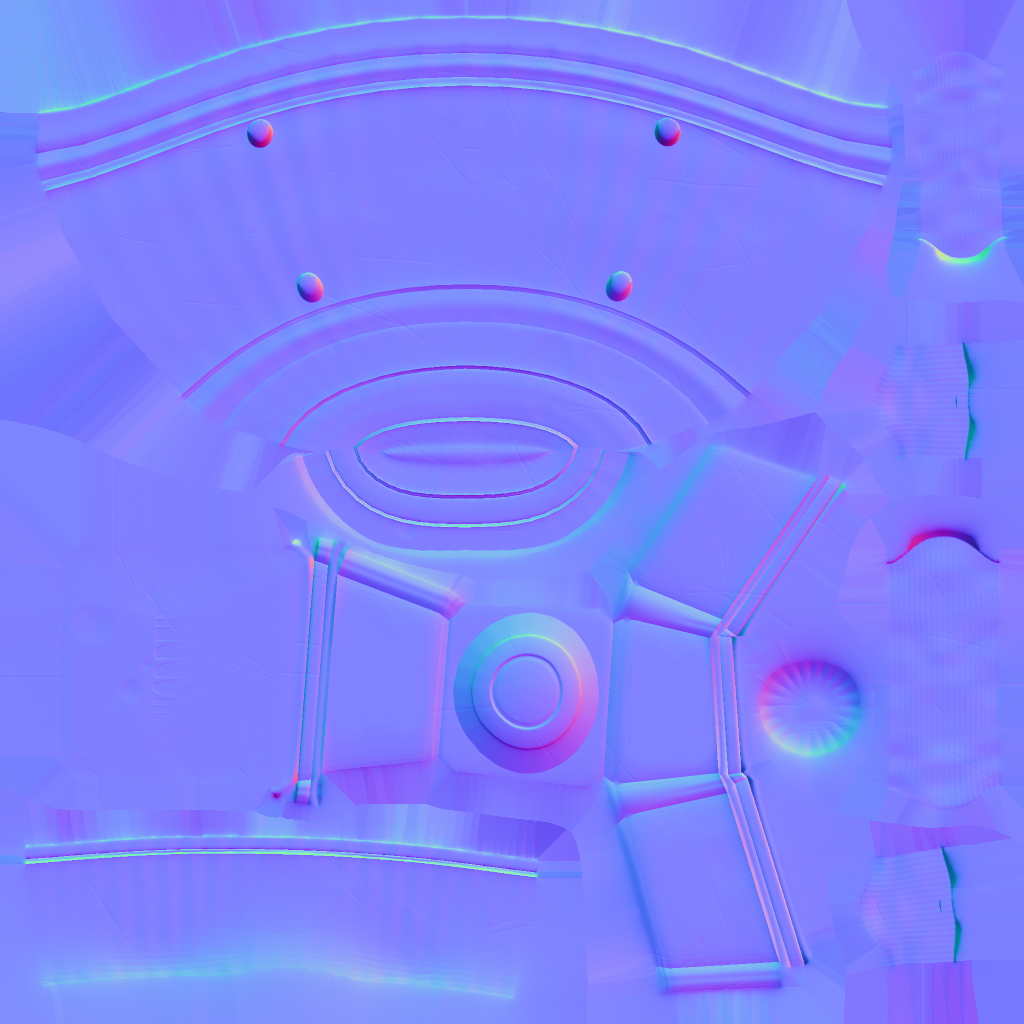
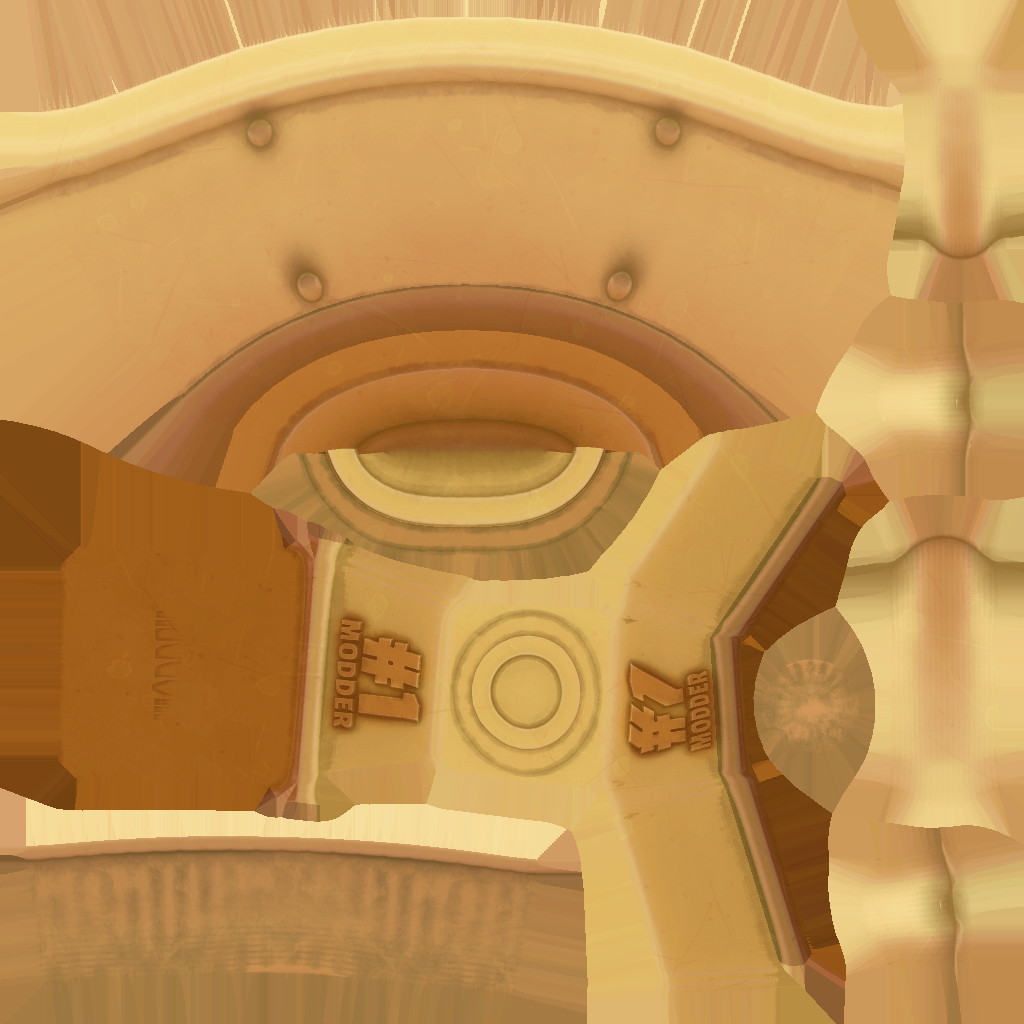
These are our texture files. A diffuse and a normal map.
Diffuse map
A diffuse map is a texture used to define an object's main color.
Normal map
A normal map is used to fake details on a low-resolution model. Each pixel of the map stores the a direction at that point of the model. Those directions are called "normals". This creates the illusion of more detail and a better curvature. The silhouette of the model remains the same.
You can download those by right clicking and selecting 'Save Image As'.
Tip
You don't need all of theese textures, our trophy would look good enough with just the main yellow texture, but I'm including the other two to show how you can add them to your items as well.
Place those textures under a new "textures" folder inside your mod folder. Our folder structure should now look like this:
Folder Structure
It is possible to setup your materials manually using lua code, but our system can also automatically setup materials for you.
When it detects textures with the same name but with the termination _normal it sets up the material with that texture as a normal map.
Adding our Trophy Icon
You already got a glimpse of it on the start of this guide, but this is our trophy icon. Go ahead and download it by right clicking and selecting 'Save Image As'
It should be placed in a folder called "icons" inside your mod folder. Our folder structure should now look like this:
Folder Structure
Writing the Item Json.
Now that we have all of the elements that form our trophy organized in our folder in a way that Garden Paws can access it, it's time to write our actual item file.
What is JSON?
Items in Garden Paws can be defined by writing JSON files. But what is a JSON file?
From the wikipedia
JSON is an open-standard file format or data interchange format that uses human-readable text to transmit data objects consisting of parameter–value pairs.
You can think of JSON like a way of defining something with "Category -> Description" pairs.
Tip
For example, this is how you might want to describe an apple in JSON. | Category | | Description | |------------|----------|-----------------| | "Food Type" | : | "Fruit" | | "Color" | : | "Fruit" | | "Variety" | : | "Red Delicious" | | "Taste" | : | "Yummy" | | "Quantity" | : | "1" |
Our Item's JSON
So what does that look like?
trophy.json file
{
    "id" : "bToast.ModderTrophy",
    "name" : "#1 Modder Trophy",
    "icon" : "bittenToast_trophyIcon",

    "autoFurniture" : {
        "model" : "bToast_ModderTrophy",
        "texture" : "bittenToast_ModderTrophy"
    }
}
Breaking it down.
To the left of the colon is the parameter we're writing, and to the right is value we're writing to that parameter. It's easy to read, but sometimes can be a little tricky to write. It's common to miss a comma or put a bracket in the wrong place. So here are some things to look out for:
Comma Placement
Make sure to separate each parameter with a comma, EXCEPT the last parameter before ending a bracket.
An item definition could be as simple as this. In this case our item wouldn't be placeable, but it would still be available in our inventory.
{
    "id" : "bToast.ModderTrophy", <- Comma
    "name" : "#1 Modder Trophy", <- Comma
    "icon" : "bittenToast_trophyIcon"  <- No Comma since it's the last line before closing a bracket
}
Double Quotes are only for text.
Values like numbers or true/false can't have double quotes around it.
If we want to define a buy price for our item we would do it with the parameter "buy" which expects a number value. For numbers we don't use double quotes so it would look like this:
{
    "id" : "bToast.ModderTrophy",
    "name" : "#1 Modder Trophy", <- Has Double Quotes since 1 in this case is part of the name.
    "icon" : "bittenToast_trophyIcon",
    "buy" : 500  <- No Double Quotes since it's a number
}
JSON Inside a JSON
Our Item by itself is just an item, if we want it to be a buildable object we need to either write an entity code in lua, or add the "autoFurniture" parameter to our JSON.
The "autoFurniture" parameter is another JSON, so it can get more confusing. This is how our item looks so far:
{
    "id" : "bToast.ModderTrophy",
    "name" : "#1 Modder Trophy",
    "icon" : "bittenToast_trophyIcon"
}
The "autoFurniture" JSON looks like this:
{
    "model" : "bToast_ModderTrophy",
    "texture" : "bToast_ModderTrophy"
}
So what we need to do is combine those 2 by defining the parameter "autoFurniture" to be this new JSON, this way we end up with a new set of open/close brackets inside of the first one that contains our item.
{
    "id" : "bToast.ModderTrophy",
    "name" : "#1 Modder Trophy",
    "icon" : "bittenToast_trophyIcon"**,** <- **Remember to add a new comma!**
    "autoFurniture" :  {
            "model" : "bToast_ModderTrophy",
            "texture" : "bToast_ModderTrophy"
    }
}
Make sure to Open/Close your brackets in the correct order and location!
Tip
The spacing (tabs/spaces) of the examples help see more clearly what is going on but they're not necessary. You can have the file all be one line, or have different indentations and it will work all the same:
{ "id" : "bToast.ModderTrophy", "name" : "#1 Modder Trophy", "icon" : "bittenToast_trophyIcon" }
The Parameters
There are many other parameters that can be used, but for the purposes of our first mod these are the ones we'll be using. You can find the full list of references on the navigation menu in the left side of the documentation.
What is a string?
In programming, a string is traditionally a sequence of characters. When a parameter is of type string it should be filled with text. JSON can be stored in text form in a string value, but it is more specific in how it is written as we've seen before.
Item Parameters
| Parameter | Type |  Description Description |
|---|---|---|
| id | string |
The ID for this item. IDs are unique identifiers that are used by code and aren't seen by players. Make sure to make it unique so it doesn't conflict with other mods or existing in-game items. This ID can't have spaces. It will be used to retrieve this item's information from other quests/mail/recipes etc. |
| name | string |
Item name, will appear in the inventory and in other places that reference the item. |
| icon | string |
Item's Icon file name (Without file extension, so if the icon filename is "ball.png"" just write "ball"). Place the file in the 'icons' folder of the mod. |
| autoFurniture | JSON |
JSON with its own parameters for the autoFurniture process. |
autoFurniture Parameters
| Parameter | Type | Description |
|---|---|---|
| model | string |
The model file name for this furniture. Make sure not to include the extension, just the name of the file. (Example: "ball", NOT "ball.obj") |
| texture | string |
The texture file name for this furniture. Make sure not to include the extension, just the name of the file. (Example: "ball", NOT "ball.png") |
Tip
You can think of an ID like the numbers you have on your ID Card. They're unique to you and can be used by the government to find information about you specifically and are usually not seen by other people. Your name however is public for everyone to see and isn't unique. There's a good chance there are other people out there in the world with the same full name as you.
Write the file.
To write your json file create a new folder called "items" then right click anywhere on that folder and select New -> Text document. Name it "trophy.json" and make sure to erase the .txt that new text files usually have. You can then open it in notepad to edit it.
Warning
It's easy to forget to close a bracket or add a comma when writing your json files. There is an easy way to catch those mistakes though. https://jsonlint.com/ is a Json file validator. You can copy-paste your json contents in there and click validate. If it finds an error it will give you an error message and highlight the potential errror line.
This is how our folder structure should look like now:
Folder Structure
Getting the Item
That's it! We should have a brand new Modder Trophy in our game's database now, ready to be used!
But... We can't get it. It's not a part of any quests, it's not a part of any crafting recipes... How can we get our item?
Let's see a couple of ways of getting our hands on that trophy.
Mail is an easy way to send our item. For that we'll create a folder called "mail" and a new json file for our mail.
Folder Structure
This is how our folder structure should look like:
Folder Structure
mail.json │ ├────
Our Mail's JSON
And this is what our file looks like:
mail.json file
{
    "id": "btoast.ModderMail",
    "relativeToId": "gamestart",
    "day": 0,
    "from": "Bitten Toast",
    "subject": "For our newest modder!",
    "letter": "This is a trophy reserved for our best modders! \n\n Take good care of it! You earned it!",
    "signature": "Bitten Toast Games",
    "items": "bToast.ModderTrophy : 1"
}
A few things to note here. The parameter "relativeToId" controls what event this mail is watching out for. Events are how most progression happens in Garden Paws. They keep track of every quest you complete, every mail you receive, every achievement and many other things.
As an example example, when completing a quest, that quest's ID will be saved as an event with the time you completed it. Through code it is then possible to check if you have completed that quest and when exactly in-game you completed it.
The mail system uses this information to decide which emails to deliver when. So if we wanted our mail to appear after a certain quest we'd write the quest's ID in "relativeToId". In this case we want the mail to arrive right away though.
We have a primordial event in this game that gets recorded right when the world is first created at time "0". That event is called gamestart.
So for this mail we'll define "relativeToId": "gamestart" and for "day" we'll define 0 (no quotations since it's a number!). As an example, If we wanted it to arrive 3 days after the world is created we'd defime it 3.
To attach items to our mail we need to set the "items" parameter. It takes a string in the following format " ItemID : Amount, ItemID2 : Amount2 ". So if I want to get 1 copy of the trophy it needs to be set to: "items": "bToast.ModderTrophy : 1"
That's it!
And that's it! If everything went according to plan you should now be the proud owner of a Modder Trophy!
Congratulations! I hope this guide was helpful to you, can't wait to see what other awesome mods you will come up with!
If you have any questions make sure to pop over to the Bitten Toast Games Discord in the #modding-corner channel or check the comments below!